
Nozzle tip set power washer choices look simple until you’re staring at five colors, streaky concrete, and a surface you’re scared to etch. The good news is that most “bad pressure washer results” come from a few fixable mismatches: wrong spray angle, wrong orifice size, or a tip that’s partly clogged.
If you pick the right tip for the job, you usually get three wins at once, faster cleaning, less fatigue, and fewer mistakes like stripping paint or carving lines into wood. That matters whether you’re washing a driveway on weekends or maintaining equipment for work.
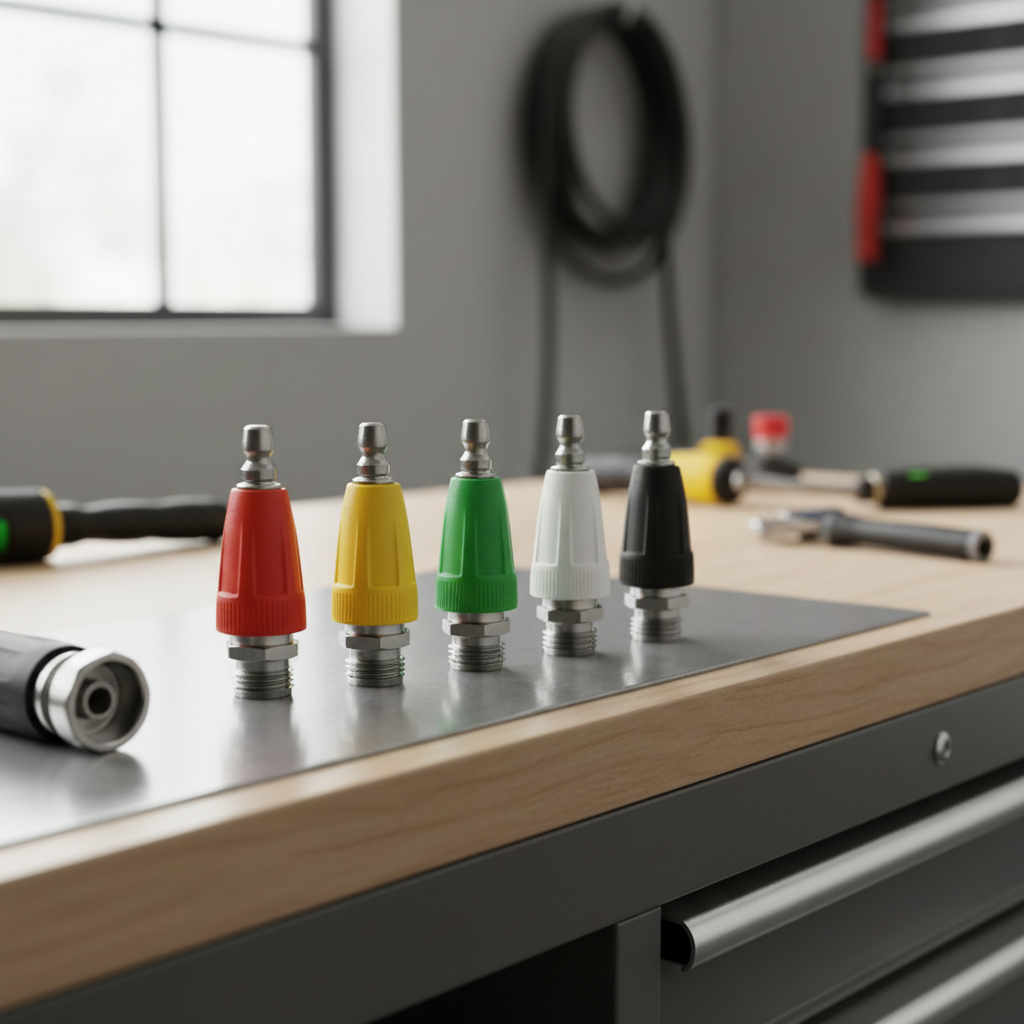
This guide breaks down what a nozzle set actually does, how to choose sizes that match your machine, and how to use each tip without overthinking it. I’ll also call out common “seems fine but isn’t” scenarios, like a worn tip that quietly kills performance.
What a nozzle tip set actually changes (and why it matters)
A pressure washer’s pump sets the potential, but the nozzle decides how that power lands on the surface. Swap the tip and you’re changing two practical things: spray pattern and the effective pressure at the impact point.
- Spray angle: Narrow patterns concentrate force for stubborn grime, wider patterns spread force for safer rinsing.
- Flow restriction: The orifice size in the tip affects how much water can pass, which can change how the washer feels and performs.
According to OSHA, pressure washers can cause serious injection injuries, which is a reminder that “just one notch more aggressive” can go from helpful to risky fast, especially with tight-angle tips. If you’re unsure, start wider and step down carefully.
Quick cheat sheet: common nozzle colors and when to use them
Most sets in the U.S. follow a familiar color system. Brands vary a bit, but this covers what you’ll usually see in a nozzle tip set power washer kit.
| Color / Angle | What it’s good for | What to watch out for |
|---|---|---|
| Red / 0° | Stuck-on residue in tiny spots, metal tools (carefully) | High risk of etching, gouging wood, stripping paint |
| Yellow / 15° | Concrete stains, heavy mildew on hard surfaces | Can scar softer concrete or wood if you linger |
| Green / 25° | General exterior cleaning, siding, patios | Still strong up close, keep a steady distance |
| White / 40° | Rinsing, windows (with care), delicate surfaces | May feel “weak” if your real issue is detergent dwell time |
| Black / soap | Applying detergent (low pressure) | Not for blasting, needs the right soap and dwell time |
Key point: if you’re chasing “more power,” don’t default to red. A 25° or 15° tip at the right distance often cleans faster because you can keep a consistent pace without damaging the surface.
How to choose the right tip size: PSI, GPM, and orifice numbers
Here’s where a lot of sets quietly fail: they fit your quick-connect, but the orifice size doesn’t match your washer’s PSI and GPM. That mismatch can lead to weak cleaning, pulsing, or stressing the pump.
Most tips are labeled with something like “25025.” The last two digits often refer to the spray angle (25°), and the first part relates to the orifice size/flow class. The exact marking scheme varies by manufacturer, so treat the label as a clue, not gospel.
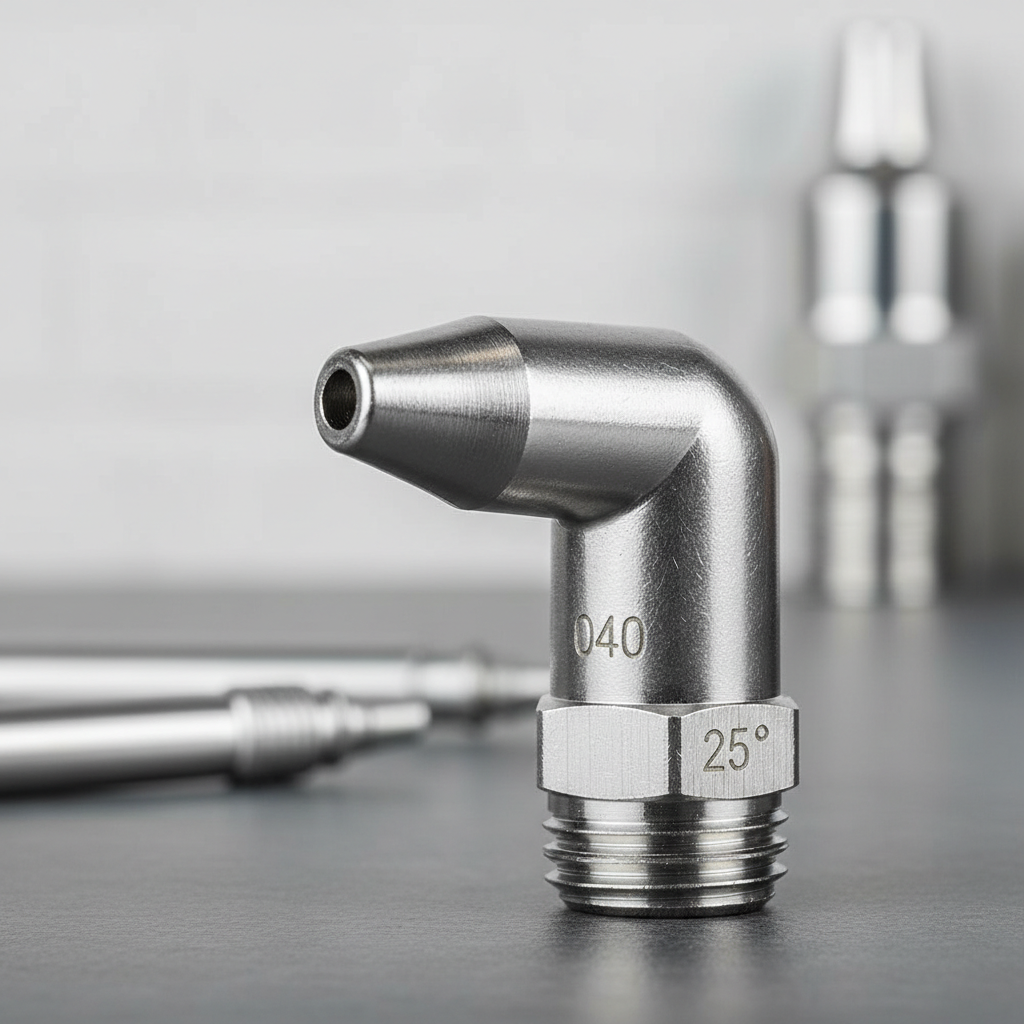
Practical buying steps that usually work:
- Check your machine label/manual for rated PSI and GPM. If you can’t find it, look up the exact model number on the manufacturer site.
- Match the tip orifice to your GPM. Many retailers list “for X GPM” in the product specs, which is easier than decoding numbers.
- When in doubt, don’t undersize. A too-small orifice can spike pressure and increase wear; too-large tends to feel weak but is often safer.
According to the Pressure Washer Manufacturers’ Association (PWMA), using the right accessories and following manufacturer guidance supports safer operation and better results. If your washer manual specifies nozzle sizing, trust that over generic charts.
Self-check: what your current results are telling you
Before you buy another nozzle tip set power washer kit, it’s worth diagnosing what’s actually going wrong. These quick checks save money and frustration.
- Streaks on concrete: You’re often too close with a narrow tip, moving too slowly, or skipping pre-treatment and dwell time.
- Washer “pulses” or surges: Common causes include a clogged tip, air in the line, wrong orifice size, or a partially blocked inlet filter.
- It cleans, but painfully slow: Frequently a tip worn larger over time, low GPM machine expectations, or using 40° when 25° would still be safe.
- Paint lifting or fuzzy wood grain: Tip too aggressive for the surface, or holding the wand in one spot. Back off, widen the angle, and test in an inconspicuous area.
If you suspect clogging, remove the tip, rinse it, and use the included cleaning needle gently. Don’t ream it out aggressively, that can enlarge the orifice and permanently change performance.
How to use each nozzle tip (real-world workflow)
A simple workflow tends to beat constant tip swapping. The goal is to use the mildest tip that still moves dirt consistently.
1) Start with prep, not pressure
Wet the surface, knock off loose debris, then apply detergent with the soap tip if you’re using chemicals. Let it dwell for the label-recommended time, but don’t let it dry.
2) Step up spray angle gradually
- Try 40° for a safe first pass, then switch to 25° if grime isn’t moving.
- Use 15° for stubborn spots, keeping more distance and constant motion.
- Reserve 0° for very limited, controlled use, and avoid soft materials.
3) Keep distance consistent
Distance is your “fine adjustment.” Many surface-damage stories come from a good tip used too close. If you see the surface changing color or texture instantly, you’re likely too aggressive.

Quick habit that helps: lock in a comfortable stance and “paint” the surface in overlapping passes. If you’re constantly changing wrist angle, you’ll leave zebra stripes.
Mistakes that make a nozzle set feel “bad” (even when it’s fine)
A lot of complaints about tips come down to setup details that don’t look like a big deal in the moment.
- Mixing up quick-connect sizes: Many consumer wands use 1/4-inch quick connect, but not all setups do. Don’t assume.
- Using the wrong tip for detergent: Soap nozzles run low pressure by design; they’re not meant to blast.
- Ignoring tip wear: A worn nozzle can increase flow, drop effective pressure, and change the spray fan, which makes cleaning feel inconsistent.
- Trying to “fix” low GPM with a narrow tip: It might feel stronger, but it can slow you down and raise damage risk.
- Skipping surface testing: Especially on wood, painted trim, older mortar, or automotive finishes.
According to CDC guidance on chemical safety, cleaning products should be used as directed on the label and never mixed unless the label explicitly allows it. That’s extra relevant when you’re applying detergent through a washer and creating airborne mist.
Buying checklist: what to look for in a quality set
If you’re shopping, focus on fit, sizing, and materials, not just “5-piece set” marketing.
- Correct orifice options for your washer’s GPM range (many sellers list compatibility, use it).
- Stainless steel or hardened inserts if you use the washer often; they tend to resist wear better than softer metals.
- Clearly marked angles so you can grab the right one quickly, especially if multiple people use the washer.
- Storage case or holder so tips don’t vanish into the garage floor dimension.
- Extra items you may actually use: tip cleaning tool, spare O-rings, or a short coupler.
Key takeaways for most homeowners:
- Match the tip to your machine ratings before chasing “stronger” spray.
- Use 25° as your workhorse, 40° for safer rinsing, 15° for stubborn areas.
- Reserve 0° for very limited use, and treat it like a specialty tool.
Conclusion: a better nozzle set is mostly about better matching
The right nozzle tip set power washer setup usually comes down to matching your washer’s flow, picking angles based on surface hardness, and using distance as your control knob. If your results look uneven or your washer surges, troubleshoot the tip and sizing before upgrading the entire machine.
If you want one practical next step, check your washer’s PSI/GPM, then confirm the tip orifice compatibility on the set you’re considering. After that, run a quick test area with 40° then 25° and adjust distance until the surface cleans evenly without leaving marks.